Imagine walking into a warm and cozy kitchen, enveloped in the irresistible aroma of freshly baked bread. Your heart skips a beat as you contemplate sinking your teeth into a crusty, golden loaf, its soft and fluffy interior waiting to be savored. In this article, you will discover the secrets to baking the best homemade bread, from choosing the right ingredients to mastering the art of kneading and proofing. Get ready to embark on a delightful culinary journey that will fill your home with the intoxicating fragrance of warm bread, and leave your loved ones begging for more.

Choosing the Right Ingredients
Selecting the Flour
When it comes to selecting the flour for your homemade bread, you have a few options to consider. All-purpose flour is a versatile choice that works well for most bread recipes. If you want a lighter and more tender bread, you can opt for bread flour, which has a higher protein content. Whole wheat flour adds a nutty flavor and extra fiber to your bread. Experiment with different types of flour to find the one that suits your taste preferences and dietary needs.
Using the Right Yeast
Yeast is an essential ingredient in bread baking as it helps the dough rise and gives the bread its light and airy texture. There are two main types of yeast: active dry yeast and instant yeast. Active dry yeast needs to be dissolved in warm water before using, while instant yeast can be added directly to the dry ingredients. Both types work well in bread recipes, so choose the one that is most convenient for you.
Adding Salt and Sugar
Salt and sugar are often overlooked but important ingredients in bread baking. Salt enhances the flavor of the bread and helps control yeast activity. Without salt, your bread might taste bland. Sugar, on the other hand, provides food for the yeast and helps create a golden crust. It also adds a touch of sweetness to the bread. Be sure to add the right amount of salt and sugar to achieve the perfect balance of flavors in your homemade bread.
Choosing Liquids
The liquid used in bread recipes can vary, and it can have an impact on the texture and taste of the final product. Water is the most common liquid used, but you can also experiment with milk, buttermilk, or even fruit juices to add extra flavor and richness. The temperature of the liquid is important too. For yeast activation, warm liquids (around 110°F) are typically used, but always refer to the recipe instructions for the recommended temperature.
Optional Ingredients
To add an extra touch of flavor and texture to your bread, you can consider adding optional ingredients. This could include herbs, spices, nuts, seeds, dried fruits, or even cheese. These ingredients can be incorporated into the dough during the mixing process, allowing them to be evenly distributed throughout the bread. Don’t be afraid to get creative and personalize your bread with these optional ingredients.
Preparing the Bread Dough
Measuring Ingredients Accurately
Accurate measurements are crucial when making bread. Use measuring cups and spoons specifically designed for dry and liquid ingredients respectively. Spoon flour into measuring cups and level off the top with a knife for precise measurements. It’s also important to follow the recipe and measure ingredients as instructed, especially for the yeast, salt, and sugar. Taking the time to measure ingredients accurately will help ensure consistent results with your homemade bread.
Mixing the Dry Ingredients
Start by combining the flour, salt, sugar, and any other dry ingredients called for in the recipe. Whisk or sift them together in a large bowl until well combined. This step is important as it helps evenly distribute the salt, sugar, and any other dry flavorings throughout the flour. Mixing the dry ingredients beforehand also ensures that they will be thoroughly incorporated into the dough.
Activating the Yeast
If you are using active dry yeast, begin by activating it. Dissolve the yeast in warm water with a pinch of sugar and let it sit for about 5-10 minutes until it becomes frothy. This frothy mixture indicates that the yeast is active and ready to be added to the dough. If you are using instant yeast, you can skip this step, as it can be added directly to the dry ingredients.
Kneading the Dough
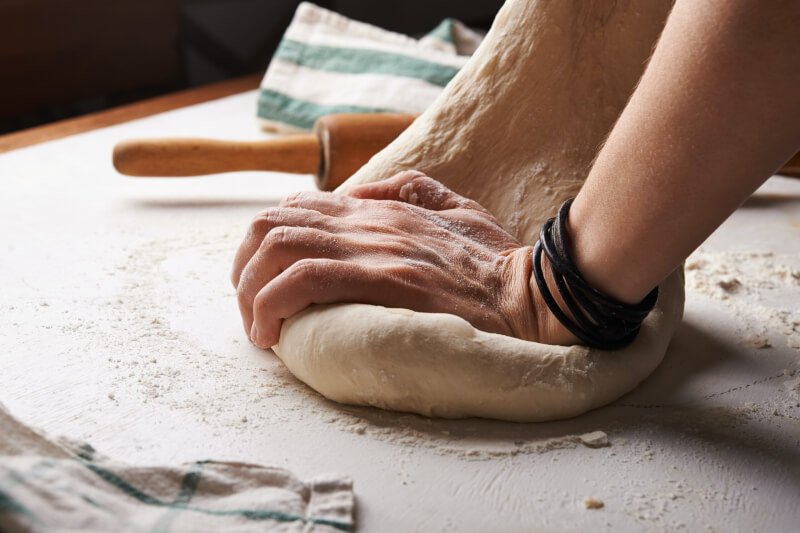
Once you have mixed the dry ingredients and activated the yeast, it’s time to bring the dough together. Start by pouring the wet ingredients into the dry ingredients. Use a wooden spoon or your hands to mix everything until a shaggy dough forms. Then, transfer the dough to a clean, floured surface and begin kneading. Knead the dough by pushing it away from you with the heels of your hands, then folding it back towards you. Continue this process for about 8-10 minutes or until the dough becomes smooth and elastic.
Monitoring the Consistency
During the kneading process, you’ll want to pay attention to the consistency of the dough. Ideally, the dough should be slightly tacky, but not overly sticky. If the dough is too sticky, gradually add small amounts of flour and knead it in until the dough reaches the desired consistency. On the other hand, if the dough appears dry and crumbly, add small amounts of water and continue kneading until it becomes more pliable.
Adding Optional Ingredients
If you’re planning to add optional ingredients to your bread, such as herbs, nuts, or dried fruits, this is the time to incorporate them. Sprinkle the ingredients evenly over the dough and fold the dough in on itself to distribute them. Continue kneading for a few minutes, ensuring the optional ingredients are evenly dispersed throughout the dough.
Allowing the Dough to Rise
After kneading and optional ingredient incorporation, it’s time to let the dough rise. Place the dough in a lightly greased bowl and cover it with a clean kitchen towel or plastic wrap. Find a warm spot in your kitchen where the dough can rise undisturbed for about an hour or until it has doubled in size. This rising period allows the yeast to ferment and produce carbon dioxide, which creates air pockets in the bread, resulting in a light and fluffy texture.
Punching Down the Dough
Once the dough has completed its first rise, it’s time to punch it down. Gently press your fist into the center of the dough to release any trapped air. This step helps redistribute the yeast and further develop the gluten structure. After punching down the dough, it is ready to be shaped and prepared for its final rise.

Shaping and Preparing the Loaf
Choosing the Shape
When it comes to shaping your bread, there are numerous options to choose from. The most common shapes are round, oval, and traditional loaf shapes. Round loaves are often used for crusty artisan bread, while oval and traditional loaf shapes are perfect for everyday sandwich bread. Choose the shape that suits your preference and the intended purpose of the bread.
Shaping the Loaf
To shape the loaf, start by gently patting the dough into a rectangle. From there, tightly roll the dough up starting from one of the shorter ends. Once rolled, pinch the seam to seal it. To create tension on the surface of the loaf, place your hands on both ends of the dough and roll it back and forth on the countertop. This motion helps achieve a smooth and taut surface tension, which will result in an evenly shaped loaf.
Preparing the Baking Pan
Before placing your shaped loaf in the baking pan, prepare it by lightly greasing it or lining it with parchment paper. This prevents the dough from sticking to the pan during baking. Place the shaped loaf into the prepared baking pan and gently press it down to ensure it fills the pan evenly. If you prefer a crustier bread, you can also place the shaped loaf directly onto a baking stone or onto a baking sheet lined with parchment paper.
Decorating the Loaf (optional)
If you want to add a decorative touch to your bread, you can consider using a bread lame to score the surface of the dough. This creates patterns or designs on the crust, and it also allows the bread to expand evenly during baking. You can also sprinkle some additional seeds, herbs, or cheese on top of the loaf to enhance the presentation and flavor of the bread.
Final Rise
After shaping and decorating the loaf, it needs to undergo its final rise. Place the loaf back in a warm, draft-free spot and cover it loosely with a kitchen towel or plastic wrap. Allow the dough to rise for about 30-45 minutes, or until it has visibly increased in size. This final rise helps the dough relax and proof, leading to a softer crumb texture and improved flavor development.
Baking the Bread
Preheating the Oven
Before baking your homemade bread, make sure to preheat the oven to the specified temperature in your recipe. Preheating the oven ensures that the bread bakes evenly from the moment it enters the oven.
Creating Steam
To achieve a crisp, golden crust, creating steam in the oven during the initial stages of baking is important. This can be done by placing a heatproof pan or tray filled with boiling water on the bottom rack of the oven while preheating. Alternatively, you can spritz the dough with water just before placing it in the oven. The steam helps the dough rise and encourages the formation of a beautiful crust.
Placing the Bread in the Oven
When the oven is preheated and steam has been created, it’s time to place the bread in the oven. Carefully transfer the risen dough from the baking pan to the preheated oven. Place the pan onto the middle rack for even heat distribution. Close the oven door gently to avoid causing any sudden temperature changes.
Monitoring the Baking Process
During the baking process, it’s important to monitor the bread closely to ensure it doesn’t overbake or underbake. Most bread recipes have specific baking times provided. However, factors such as oven temperature accuracy, pan size, and dough characteristics can affect the baking time. Keep an eye on the bread as it bakes and adjust the baking time accordingly if necessary.
Performing the Tap Test
A reliable way to determine if your bread is fully baked is by performing a tap test. After the recommended baking time is complete, remove the bread from the oven and let it cool for a few minutes. Then, flip the loaf over and tap the bottom with your fingertips. If the bread sounds hollow, it is a good indication that it is done. If not, return it to the oven for a few more minutes until it reaches the desired doneness.

Cooling and Storing the Bread
Removing the Bread from the Oven
Once the tap test confirms that your bread is fully baked, carefully remove it from the oven. Use oven mitts or an oven rack tool to avoid burning yourself. Transfer the bread to a wire rack to cool.
Allowing the Bread to Cool
Although it can be tempting to slice into your freshly baked loaf, it’s important to allow it to cool completely before doing so. Cooling allows the bread’s internal moisture to redistribute, resulting in a more even texture and improved flavor. A general rule of thumb is to let the bread cool for at least 1 hour before slicing into it.
Storing the Bread Properly
To keep your homemade bread fresh and flavorful, it’s important to store it properly. Once the bread has cooled completely, wrap it tightly in plastic wrap or place it in a resealable plastic bag. Storing bread at room temperature is suitable for short-term consumption. However, if you want to store the bread for a longer period, it is best to freeze it. Slice the cooled bread, wrap individual portions in plastic wrap, and store them in a freezer bag. When you’re ready to enjoy a slice, simply thaw it at room temperature or toast it for a warm and crispy treat.
Troubleshooting Common Issues
Dense or Heavy Bread
If your bread turns out dense or heavy, it could be due to several factors. One common issue is using too much flour, which can result in a dry dough that doesn’t rise properly. Another possibility is not allowing the dough to rise for a sufficient amount of time. Make sure to measure your ingredients accurately and give the yeast enough time to work its magic during the rising process.
Bread Doesn’t Rise
Several factors can prevent your bread from rising properly. One common issue is using expired or inactive yeast. Always check the expiration date and test your yeast before using it. Another factor could be low or improper yeast activation. Ensure that the liquid used to activate the yeast is within the recommended temperature range. Lastly, a drafty or cool environment can inhibit proper rising. Find a warm, draft-free spot for the dough to rise undisturbed.
Bread Crust is Too Pale
If your bread crust is too pale, it may be due to the baking temperature being too low. Make sure to preheat the oven to the recommended temperature and ensure that your oven thermometer is accurate. Additionally, adding a bit of sugar to the dough can help promote browning and caramelization of the crust.
Bread Crust is Too Dark
On the other hand, if your bread crust is too dark, it may be because the baking temperature is too high or the bread was left in the oven for too long. Double-check your oven thermometer and reduce the baking temperature if needed. Monitor the bread closely during the baking process and adjust the baking time accordingly to prevent overbrowning.
Bread Collapses
If your bread rises initially but collapses during or after baking, it could be due to overproofing. Overproofing occurs when the dough rises for too long, causing the gluten structure to weaken and the bread to collapse under its own weight. Follow the recommended rising times in your recipe, and be careful not to let the dough rise for too long.

Adding Variations and Flavors
Using Different Flours
Experimenting with different flours can add a unique twist to your homemade bread. Consider using rye flour, whole wheat flour, or even alternative gluten-free flours to create bread with different textures and flavors. Keep in mind that different flours may require adjustments to the liquid or yeast proportions, so be sure to follow recipes specifically tailored for those flours.
Incorporating Seeds and Nuts
To add extra texture and nutritional value to your bread, incorporate seeds and nuts into the dough. Flaxseeds, sesame seeds, pumpkin seeds, and chopped almonds or walnuts are popular choices. Mix them into the dough during the kneading process, ensuring they are evenly distributed. The addition of seeds and nuts not only enhances the taste and appearance of the bread but also boosts its nutritional profile.
Adding Spices and Herbs
Spices and herbs are a fantastic way to infuse your bread with a burst of flavor. Common spices used in bread baking include cinnamon, nutmeg, and cardamom. Fresh or dried herbs like rosemary, thyme, and basil can also enhance the taste of your bread. Add these flavorful ingredients to the dough during the mixing process, and adjust the quantities based on your personal preference.
Including Fruits and Vegetables
For a sweeter or more savory touch, you can include fruits and vegetables in your bread. Dried fruits such as raisins, cranberries, or chopped apricots can add natural sweetness and tanginess. Grated carrots, zucchini, or cooked pumpkin can introduce moisture and extra flavor to the bread. Be sure to drain any excess liquid from the fruits or vegetables before incorporating them into the dough.
Making Gluten-Free Bread
Choosing Gluten-Free Flours
To make gluten-free bread, it’s important to choose the right combination of gluten-free flours. Popular choices include rice flour, almond flour, oat flour, buckwheat flour, and tapioca flour. Experiment with different ratios and combinations to find the one that produces the best texture and flavor for your gluten-free bread.
Using Xanthan Gum or Psyllium Husk
Gluten-free bread often requires the addition of binding agents to replace the function of gluten in wheat-based bread. Xanthan gum and psyllium husk are two common options. These ingredients help create structure and elasticity in gluten-free bread, resulting in a better crumb texture. Follow the recommended ratios in your gluten-free bread recipe for the appropriate amount to use.
Follow Proper Mixing Techniques
When working with gluten-free bread dough, it’s important to follow proper mixing techniques. Unlike traditional bread dough, gluten-free dough is typically wetter and more sticky. Mix the ingredients until they are just combined, avoiding excessive kneading. This ensures a more tender and moist texture in the final product.
Adjusting Baking Time and Temperature
Gluten-free bread may require adjustments to the baking time and temperature. It is common for gluten-free bread to require a longer baking time to fully cook through and develop the desired texture. Additionally, monitoring the bread closely during baking is essential, as gluten-free bread tends to brown faster than wheat-based bread. Adjust the oven temperature and baking time as needed to prevent the bread from becoming too dark or overly dry.

Exploring Different Bread Recipes
Classic White Bread
If you’re new to bread baking, classic white bread is a great place to start. It requires simple ingredients and techniques, making it a versatile choice for sandwiches or toast. The combination of all-purpose flour, yeast, salt, sugar, and water creates a timeless bread that is loved by many.
Whole Wheat Bread
For a heartier and more nutritious option, whole wheat bread is an excellent choice. It incorporates whole wheat flour, which adds fiber and a distinct nutty flavor. Whole wheat bread pairs well with a variety of toppings and fillings and is suitable for those who prefer a healthier alternative.
Sourdough Bread
Sourdough bread is a beloved classic known for its tangy flavor and chewy texture. It is made using a sourdough starter, which is a mixture of flour and water fermented with natural yeasts and bacteria. The long fermentation process contributes to the complex and rich flavor of sourdough bread.
Cinnamon Raisin Bread
Cinnamon raisin bread is a deliciously sweet and aromatic bread that is perfect for breakfast or a snack. The dough is enriched with butter, sugar, cinnamon, and plump raisins, resulting in a fragrant and flavorful loaf. Toast a slice and enjoy it with a spread of butter or cream cheese for a delightful treat.
Garlic and Cheese Bread
Garlic and cheese bread is a crowd-pleaser that combines the savory flavors of garlic and cheese with soft and fluffy bread. It’s an excellent accompaniment to pasta dishes, soups, or enjoyed on its own. The dough is infused with minced garlic and topped with a generous amount of grated cheese before baking, creating a deliciously cheesy and aromatic loaf.
Olive and Rosemary Focaccia
Focaccia is a popular Italian bread known for its tender crumb, crisp crust, and aromatic herb toppings. Olive and rosemary focaccia combines the briny taste of olives with the fragrant aroma of fresh rosemary to create a delightful savory bread. It is often enjoyed as an appetizer, dipped in olive oil and balsamic vinegar.
Multigrain Bread
Multigrain bread is a wholesome option that incorporates a variety of grains and seeds. Besides whole wheat flour, it may include ingredients such as oats, cornmeal, flaxseeds, sunflower seeds, and millet. This bread provides a hearty and nutritious base that complements a range of toppings and spreads.
Honey Oat Bread
Honey oat bread is a slightly sweet and nutty bread that is enhanced by the addition of oats and honey. The oats provide a pleasant chewiness and add a rustic touch to the bread. Sweetened with honey, this bread is perfect for breakfast or as a base for sandwiches.
Adding Artisanal Touches
Using a Bread Lame
A bread lame, or scoring tool, is a simple but useful tool for creating decorative designs on the surface of your bread. With a sharp blade, it allows you to make precise cuts on the dough, which not only adds an artisanal touch to the appearance but also helps control the expansion of the bread during baking.
Creating Decorative Scoring
Experiment with different scoring patterns to create unique and decorative designs on your bread. Some common patterns include a single slash, a tic-tac-toe pattern, or diamond shapes. Scoring not only adds visual appeal, but it also helps the bread expand in a controlled manner and adds texture to the crust.
Experimenting with Shaping Techniques
Shaping techniques can elevate the visual appeal of your homemade bread. Instead of a regular loaf shape, try braiding the dough for a beautiful and intricate pattern. Another option is to divide the dough into smaller portions and shape them into rolls or buns. These different shapes add a touch of artistry to your homemade bread.
Designing Unique Bread Patterns
Get creative and design your own unique bread patterns. Incorporate abstract shapes, geometrical patterns, or even letters into the surface of the dough. Just make sure not to make the cuts too deep, as they should only be scored on the surface of the dough to allow for proper expansion during baking.
Baking homemade bread is a rewarding and enjoyable process. With the right ingredients, techniques, and a touch of creativity, you can bake the best homemade bread that suits your taste and style. So roll up your sleeves, gather your ingredients, and savor the aromatic aroma and delicious taste of freshly baked bread that you can proudly call your own. Happy baking!
